Customize the Selector appearance and content
Transform your store's language and currency selection experience with GLC's highly customizable Selector. With GLC's intuitive customization options, you can create a selector that perfectly matches your store's design, elevates your brand, and enhances customer satisfaction.
I. How to Customize the Selector
Go to Selector in GLC and scroll down to Customization. You can set up the selector separately for Desktop and Mobile, then select the relevant section: Position, Advanced customization, or Content. All changes are reflected in the Preview on the right.
To change where the selector appears, see Manually embed and position the Selector.
II. Advanced Customization
The Advanced customization section lets you control how selector items look and how they match your storefront design.
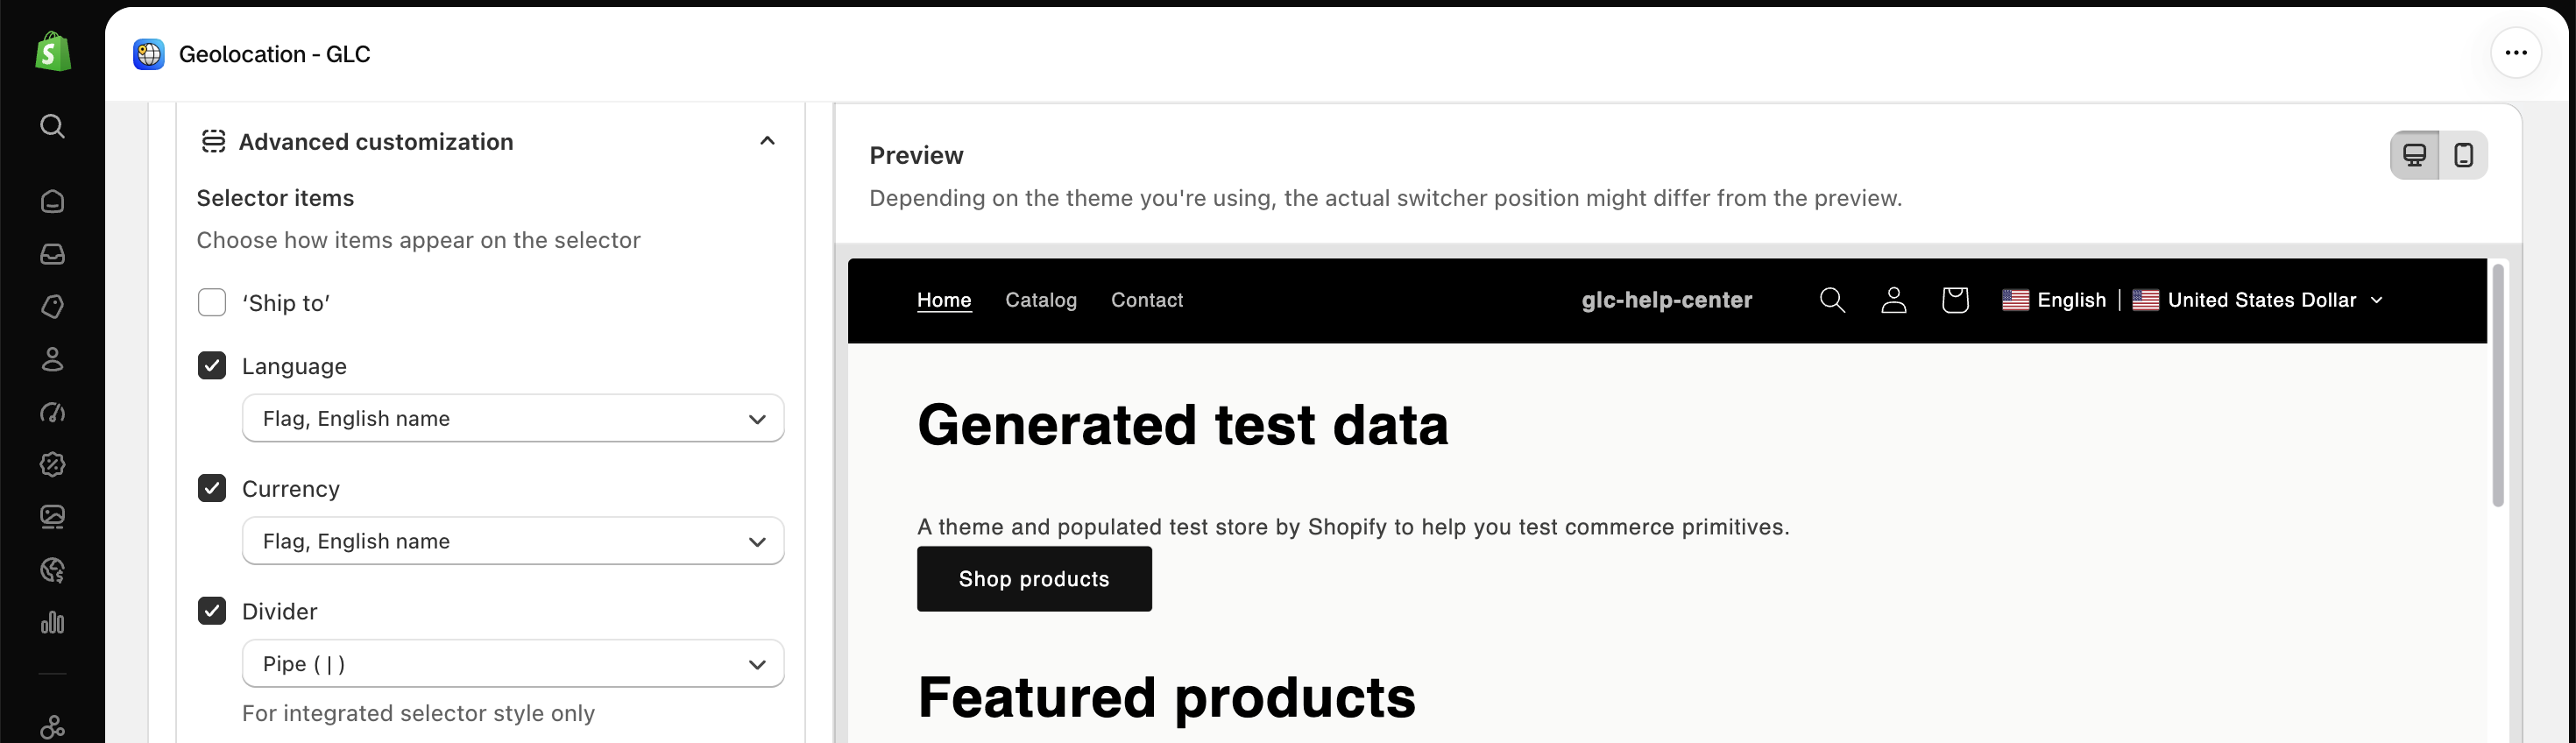
Selector items
Choose which elements appear on the selector and how they are displayed:
- 'Ship to': Show or hide the shipping destination.
- Language: Display languages as a flag, English name, or both.
- Currency: Display currencies using a flag, English name, or a combination.
- Divider: Select how items are separated (for example, a pipe
|). Available for the integrated selector style only.
Selector color
- Background color: Set a custom color and adjust its opacity for a subtle or solid look.
- Text & Icon color: Customize text and icon colors to ensure readability and brand consistency.

Disclosure display
The Disclosure display section lets you choose how items appear when customers click on the selector:
- 'Ship to': Select how destination countries are displayed. Options such as Flag and English name help customers easily identify their shipping location.
- Language format: Choose how languages are shown in the selector. Displaying the flag with the English name improves recognition and usability.
- Currency format: Define how currencies appear to customers. Using a flag and English name provides clarity and reduces selection errors.

These settings help create a consistent and user-friendly experience for international customers.
If you want to change something the app doesn't offer, such as the font or font size, contact us at [email protected]. We'll check whether we can do it for you with custom code.
III. Content Settings
The Content section lets you customize the labels shown in the selector interface. These labels guide customers when choosing their shipping destination, language, and currency.
- Label for 'Ship to' selection box: Sets the text displayed above the shipping destination selector.
- Label for language selection box: Defines the label shown for choosing a preferred language.
- Label for currency selection box: Controls the text displayed for selecting a currency.
- Label for search: Specifies the text used in the search field to help customers quickly find options.
- CTA button label: Sets the text for the action button that applies the selected preferences.
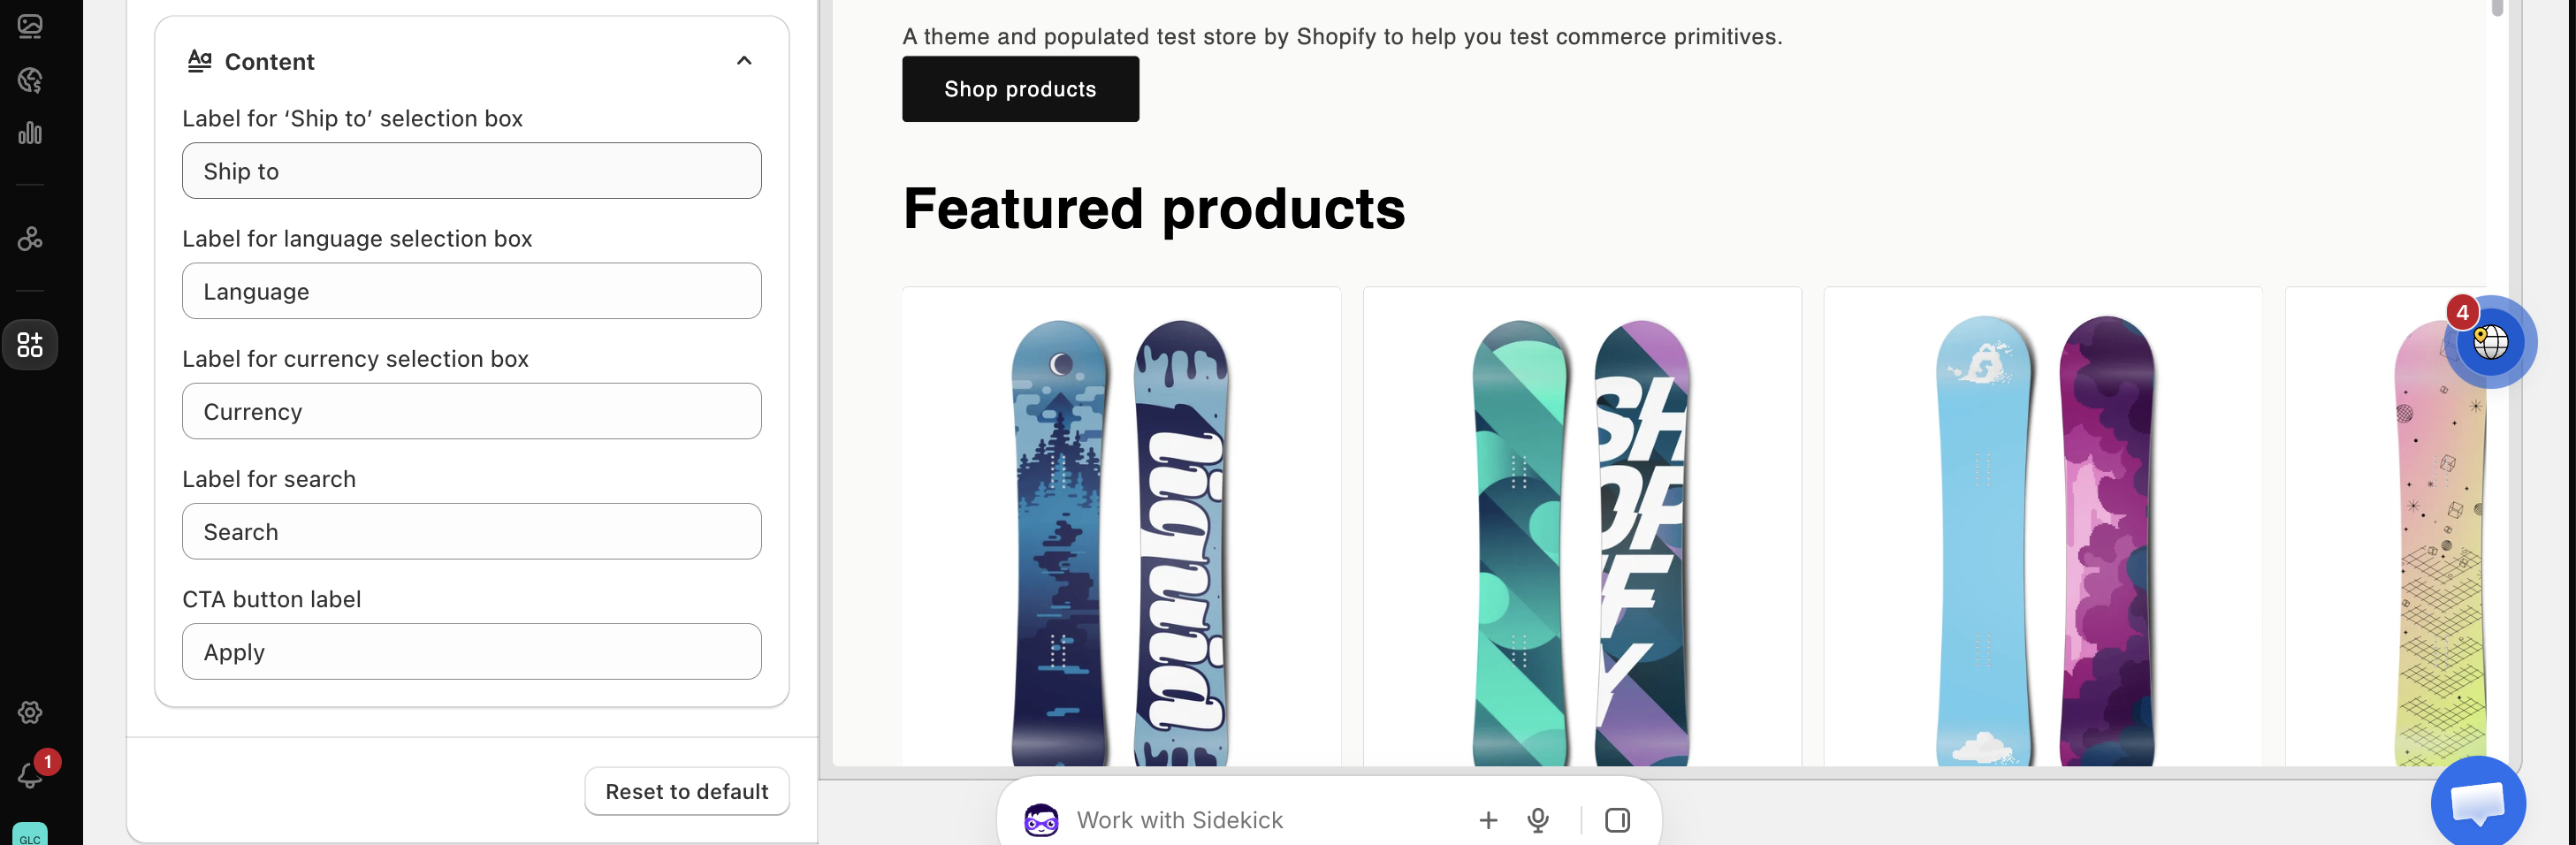
Updating these labels helps ensure clarity and consistency across your store. Click Save to apply your changes, or Reset to default to restore the default settings.
IV. Edit Language Flags
Customizing the language flags on your selector helps create a more personalized and professional experience for international visitors. GLC makes it simple to adjust the flags so they accurately represent each language and align with your brand identity.
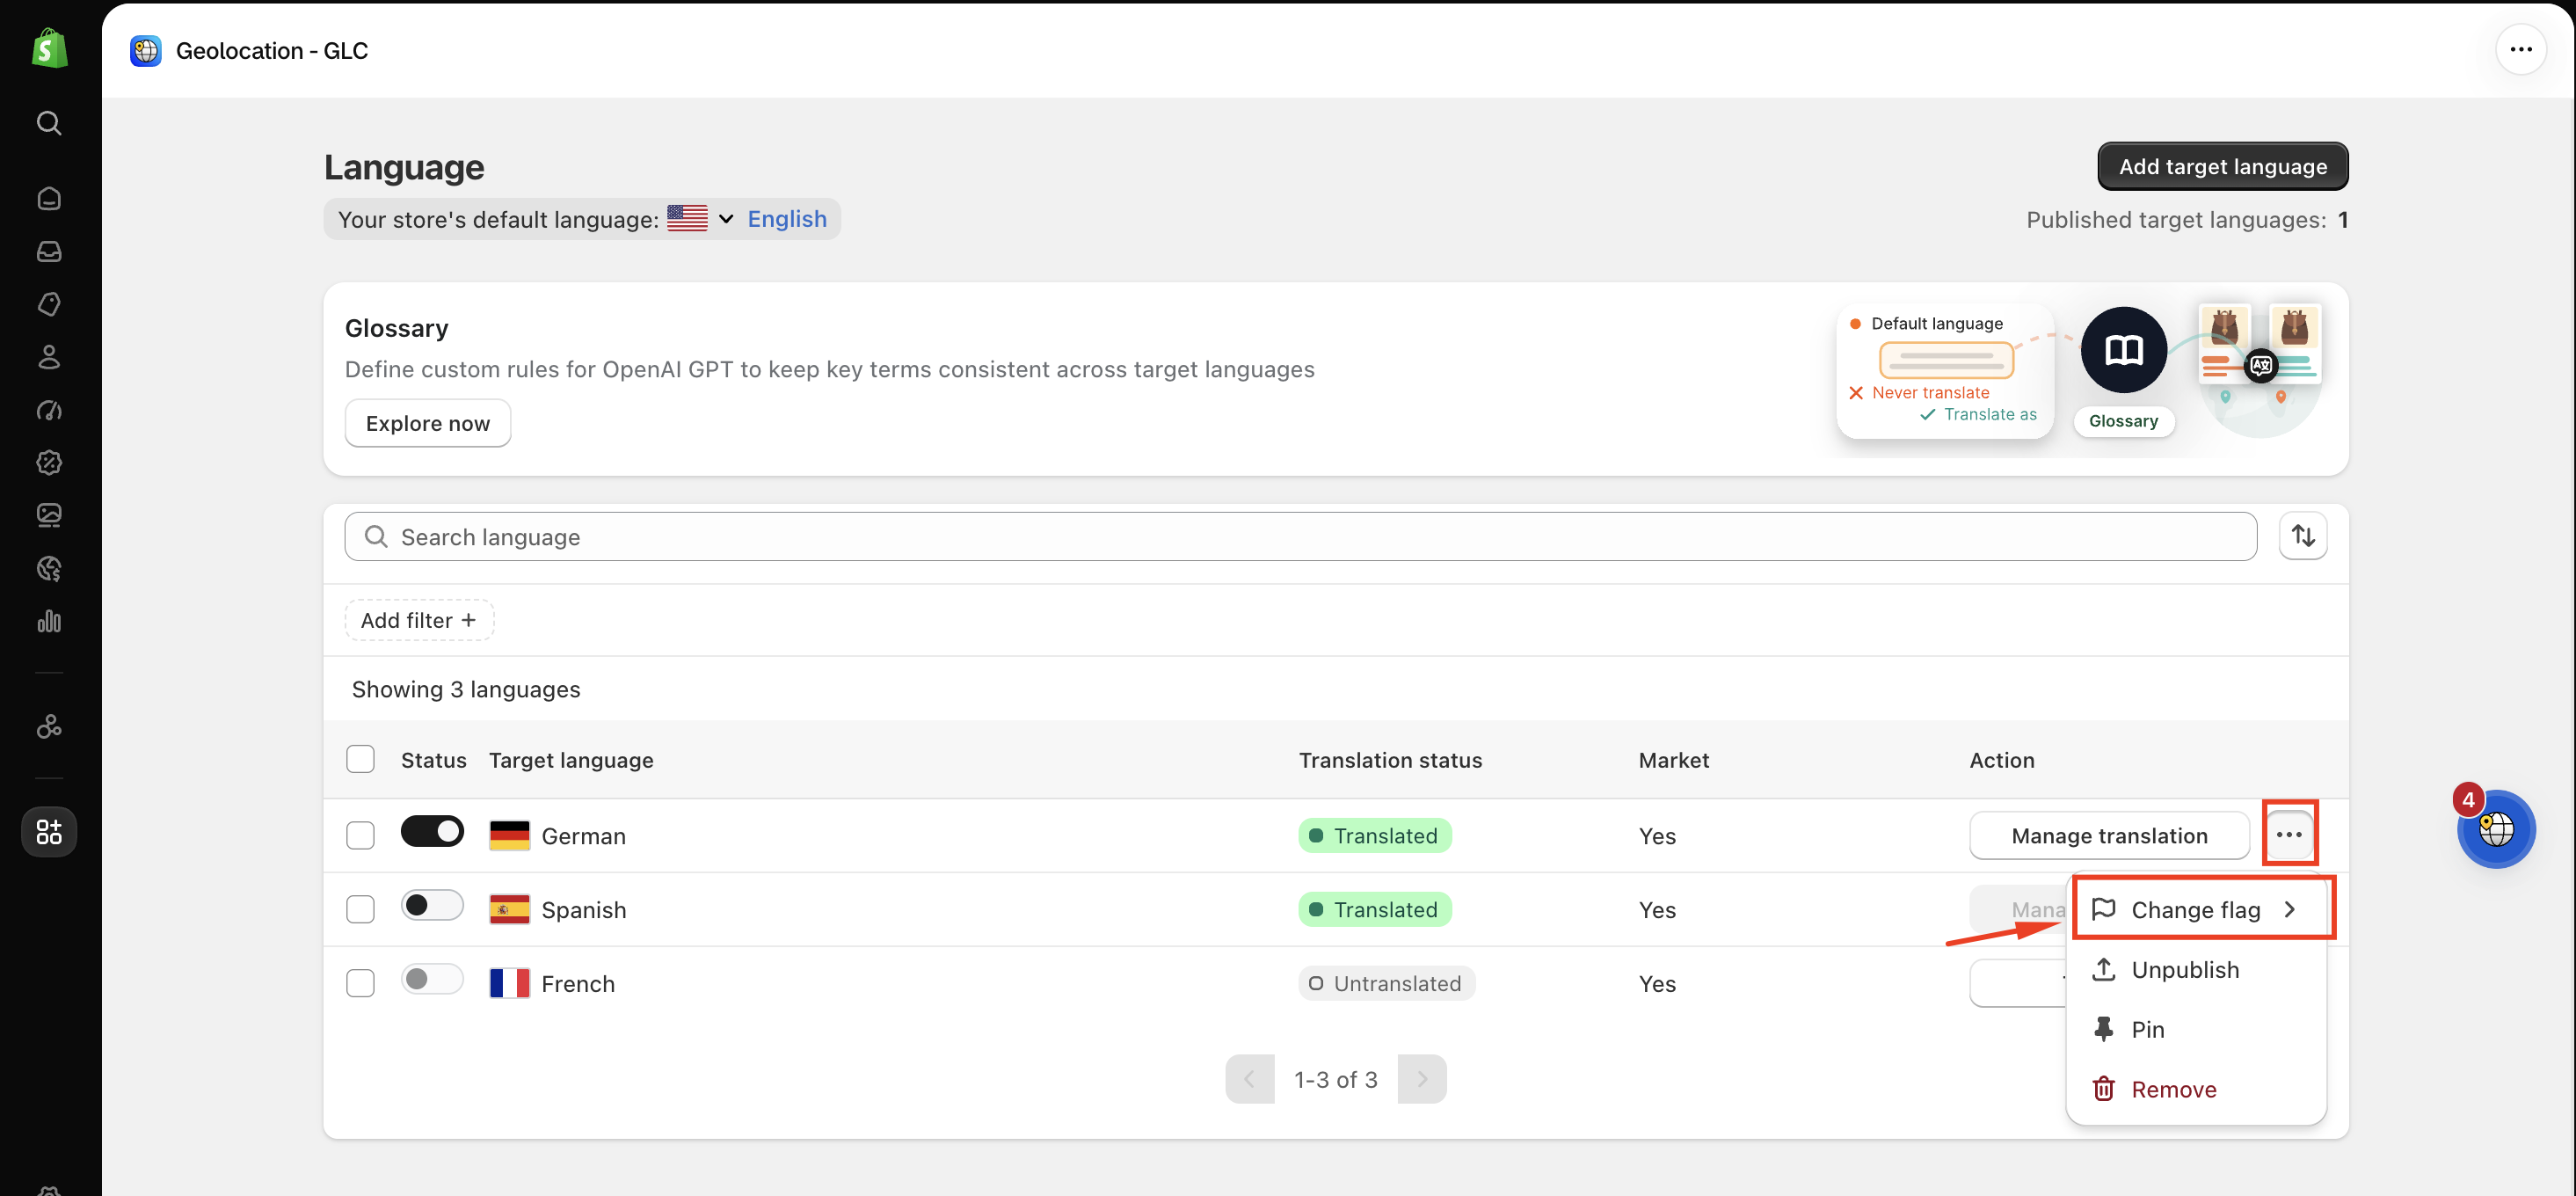
- Navigate to Language in your GLC dashboard.
- Click the three dots next to the language you want to edit.
- Select Change flag.
- Choose the flag that best represents the language or country.
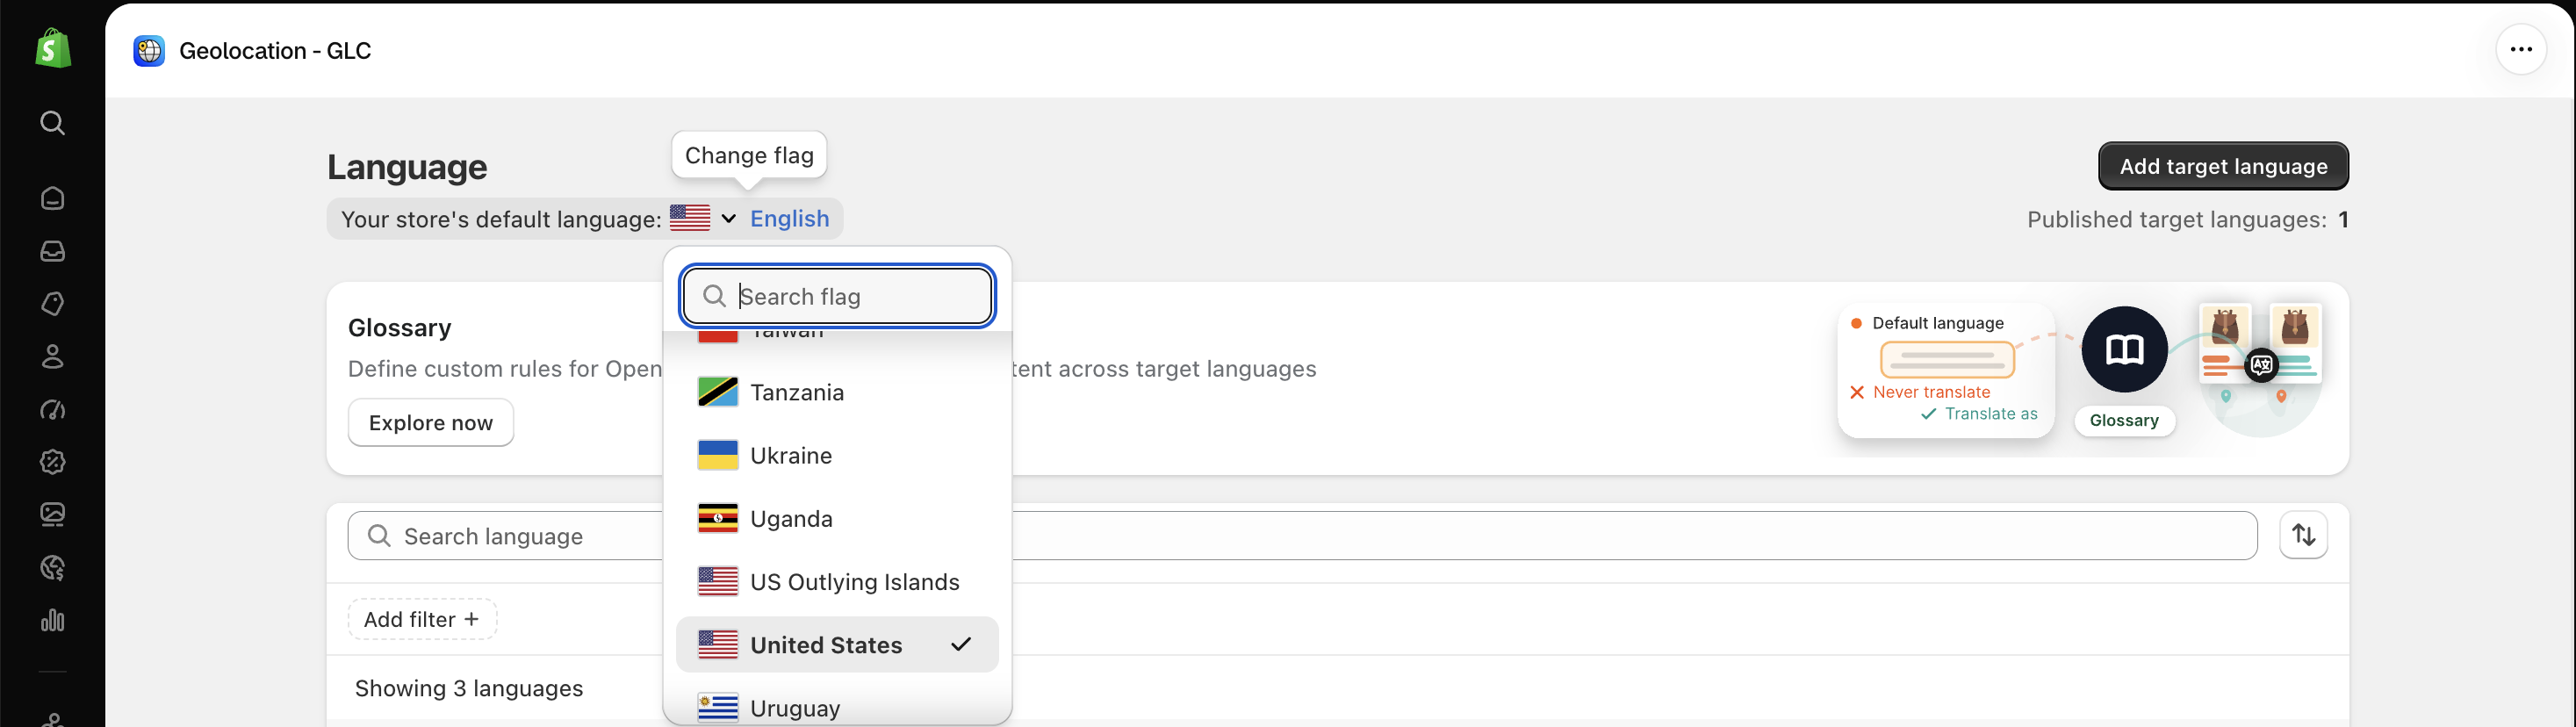
If English is your default language and you'd like to show the UK flag instead of the US flag, simply click the flag next to Your store's default language at the top of the Language page and change it.
By customizing your selector, you ensure that your multilingual store is visually consistent, intuitive, and welcoming for visitors from around the world. These small adjustments can significantly enhance the user experience and help your international customers navigate your store with ease.
If you're not sure how a setting will look on your storefront, or your changes don't show after you save, email us at [email protected]. We'll help you get the Selector looking right.